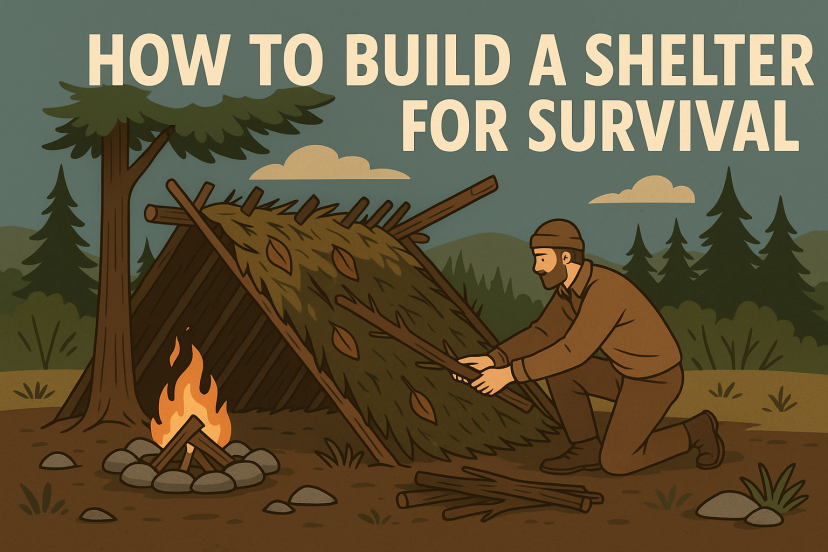
How to Build a Shelter for Survival: A Step-by-Step Guide
When you’re out in the wild, nature doesn’t always play nice. Whether you’re lost in the forest, trekking through the mountains, or caught in a sudden storm, one thing becomes clear real fast: you need a shelter. Without it, exposure to the elements can turn a bad situation into a deadly one. So, how do you build a survival shelter when your life may depend on it?
Let’s walk through the steps. I’ll show you how to build a sturdy, protective shelter with what you’ve got—no fancy gear, no shopping links, just grit and know-how. Sound good? Let’s dive in.
Why a Shelter Matters in Survival Situations
Think of your shelter as your shield. When the wind howls, rain pours, or snow falls, a shelter keeps you protected. It’s like putting on armor before a battle with the elements.
The Golden Rule: Location, Location, Location When Building Shelters
Before you even start building, ask yourself: where am I? A great shelter in the wrong place is a disaster waiting to happen.
- Stay away from flood zones like dry riverbeds.
- Avoid valleys where cold air settles.
- Look for natural barriers like large rocks or tree lines for wind protection.
- Make sure you’re near water—but not too close.
Keep It Simple: The Survival Triangle
Shelter, water, and fire form the survival triangle. Miss one, and your chances drop. Prioritize your shelter first if conditions are harsh.
Choosing the Right Shelter for Your Situation
You don’t build a log cabin when you’re on the clock. Different environments need different shelters:
- Forest? Lean-to or debris hut.
- Snowy area? Snow cave or quinzee.
- Desert? Shade-based shelter.
- Mountains? Rock overhangs and windbreaks.
Let’s focus on the most universal, beginner-friendly designs.
1. The Lean-To Shelter
Imagine propping a stick against a wall. That’s your lean-to. One of the simplest and fastest shelters to build.
How to build it:
- Find a long, sturdy branch and rest it between two trees (or rock outcrops).
- Lean smaller sticks at an angle against it.
- Cover with branches, leaves, or bark for insulation.
2. The A-Frame Shelter
Think of it as a tent made from nature. It looks like the letter “A” when viewed from the front.
Steps:
- Lay a thick ridgepole between two supports (trees work best).
- Lean sticks on both sides at an angle.
- Cover everything with natural materials like leaves or grass.
3. The Debris Hut
This is the ultimate solo shelter—compact, warm, and camouflaged.
How to make it:
- Form a ridgepole supported by a forked stick or a stump.
- Stack sticks to form a triangle-shaped frame.
- Heap on debris—think leaves, grass, pine needles—until it’s about two feet thick.
4. The Tarp Shelter (If You Have One)
A tarp is a survivalist’s best friend. Even a plastic trash bag can work wonders.
Setup ideas:
- Plow point: Stake three corners down, tie the fourth to a tree.
- A-frame tarp: Tie to two trees, stake down the sides.
5. Snow Shelter Basics
Snow can insulate as well as it chills. Counterintuitive, right?
- Snow cave: Dig into a snowbank, with a low door and raised sleeping platform.
- Quinzee: Pile snow into a dome, let it harden, then hollow it out.
6. Natural Shelter Hacks
If you’re lucky, nature has already done the heavy lifting.
- Caves (beware of animals!).
- Overhangs and cliffs.
- Dense thickets for wind protection.
What Materials Should You Use When Building A Shelter?
Here’s the beauty: you don’t need much.
- Sticks and branches (framework)
- Leaves, moss, bark (insulation and waterproofing)
- Vines or string (binding)
Pro tip: Think like a bird building a nest. Use what’s around, and use it well.
Insulation Is Everything
Even a perfect shelter fails if you ignore insulation. Think of it like wearing a jacket. You want to trap warm air inside and block cold air out.
- Line the floor with dry leaves or pine needles.
- Layer roofing materials thickly.
- Keep your body off the ground!
Ventilation: Don’t Skip It
A warm shelter can turn into a sweat lodge fast. Always leave a small gap for airflow—especially if you’re burning a fire inside.
Shelter Size Matters
Here’s a good rule: build small. The more space you have, the harder it is to keep warm. Just enough room to sit, lie down, and maybe stash your gear.
Weatherproofing Tips
- Angle your roof steep enough for rain to run off.
- Use bark, grass, or leaves to waterproof.
- Reinforce the roof if you expect snow.
Windproofing Tricks
- Face the entrance away from the wind.
- Add extra debris on the wind-facing side.
- Use logs or rocks as windbreaks.
Fire and Shelter: A Balancing Act
Fire is your heat source—but it can be your shelter’s worst enemy.
- Use a reflective wall behind the fire to bounce heat into your shelter.
- Keep fire at a safe distance.
- Build a fire bed if the ground is wet.
Shelter Maintenance 101
Built your shelter? Great. But nature keeps moving.
- Add debris daily if the roof sags.
- Check for leaks after rain.
- Replace anything moldy or wet.
Camouflage and Concealment
Need to stay hidden? Blend your shelter into the landscape:
- Cover with leaves or local foliage.
- Break up sharp lines with branches.
- Avoid smoke if stealth is a concern.
Using Tools vs. No Tools
If you have a knife or axe, shelter-building gets easier. But even without tools, sharp rocks or sheer strength can get the job done. It’s slower—but doable.
Common Mistakes to Avoid When Learning To Build A Shelter
Let’s save you some pain:
- Building too big (you’ll freeze).
- Skipping insulation.
- Building in a ditch or depression.
- Forgetting ventilation.
- Overestimating your energy.
The Mindset of a Survivor
Don’t panic. That’s the #1 rule. Your shelter won’t be perfect—and it doesn’t need to be. It just needs to keep you alive. Think of it as a nest. Cozy, compact, and lifesaving.
Conclusion: Shelter Is Your Survival Home
When you’re stripped of comfort, your shelter becomes your home base, your fortress, and your lifeline. Building one isn’t just about twigs and leaves—it’s about taking control in an out-of-control situation. Whether you’re deep in the woods or just prepping your skills, knowing how to build a shelter is survival gold.
FAQs: How to Build a Shelter for Survival
1. How long does it take to build a survival shelter?
It depends on the type and materials. A simple lean-to can take 30 minutes. A debris hut might take 2–3 hours. Practice speeds things up.
2. What’s the best shelter for cold weather?
A debris hut or snow cave is best for cold climates because they insulate body heat well. Keep them small and well-packed.
3. Can I build a shelter without tools?
Yes! Nature provides. Use rocks to cut, vines to tie, and sticks for structure. It’s more effort, but completely possible.
4. What’s the most common mistake people make?
They build too big or don’t insulate enough. Bigger isn’t better. You want to trap heat, not lose it.
5. How can I make my shelter waterproof?
Use thick layers of leaves, bark, or moss. Angle your roof steeply and layer like shingles so rain runs off.
Remember, shelter isn’t just a structure—it’s survival. So next time you’re in the wild, you’ll know what to do: find a spot, gather materials, build smart, and stay warm. Happy surviving!

