Long Term Food Storage for Emergencies and Preppers: The Ultimate Survival Blueprint
Long-Term Food Storage for Emergencies and Preppers: A Practical Blueprint
Long-term food storage is one of the most practical quiet wins in preparedness. It gives your household options when prices rise, storms disrupt deliveries, illness keeps you home, work becomes unstable, or a regional emergency interrupts normal shopping. Just as importantly, it reduces pressure. As a result, when your home has a working food buffer, you can think more clearly and make better decisions instead of reacting from scarcity.
If you want a realistic system that does not waste money, this guide will show you how to build food storage in layers, what foods make the most sense to keep, where freeze-dried kits fit, and how to avoid the common mistakes that turn a pantry project into clutter. For the broader picture, pair this guide with Being Prepared for Emergencies, your 72-Hour Emergency Checklist, and your Long-Term Water Storage guide. That way, your food plan stays connected to the rest of your emergency system.
Fast track: Start with the checklist, then build a two-week food buffer using foods you already eat. After that, add deeper storage and emergency-food backups.
Disclosure: As an Amazon Associate, SurvivalTactix earns from qualifying purchases. Some links may also be affiliate links (Survival Frog). This supports the site at no extra cost to you.
Preparedness information is for general education. Follow food-safety guidance, product labels, and official local advice during emergencies.
Start here: food storage is about margin, not panic
Good food storage does not mean buying random buckets and hoping for the best. Instead, it means building a working system your household can actually use. Ideally, that setup is organized, realistic, and easy to maintain. More importantly, it should support daily life, not just worst-case thinking.
For most households, the strongest food-storage plans start with ordinary pantry logic: buy what you already eat, store it well, label it clearly, and rotate it consistently. Then, once that base is stable, add deeper layers for longer disruptions.
Quick decide: what should you do first?
If you want the shortest possible answer, start with these five moves first:
- Build a two-week food buffer using meals and staples your household already eats
- Add water storage that matches those meals and your basic household needs
- Choose a few dense, low-cost staples such as rice, oats, pasta, beans, and canned proteins
- Store food in a cool, dry, organized space and label purchase or packing dates
- Add freeze-dried or emergency-food kits only after your regular pantry layer is working
That approach gives you immediate value and long-term resilience without forcing you into expensive first moves. In other words, it keeps the system practical from day one. Better yet, it makes rotation easier from the start.
| Best move | What it solves | Why it matters |
|---|---|---|
| Start with 2 weeks | Short disruptions, illness, storms, crowded stores | Fastest useful win for most households |
| Add dense staples | Cost per calorie and meal flexibility | Builds depth without overspending |
| Add emergency-food backups last | Longer shelf life and convenience | Best as a deeper layer, not the entire plan |
Why long-term food storage still matters
Official emergency guidance still recommends storing a several-day supply of non-perishable food and choosing foods your household will actually eat. For example, Ready.gov says to store at least a several-day supply of non-perishable food, while Health Canada advises keeping food that will not spoil in your emergency kit and planning for water and food needs together. See Ready.gov’s food guidance and Health Canada’s food and drinking water emergency guidance.
Put simply, a food buffer protects your household from both small disruptions and bigger ones. More specifically, it helps during storms, missed pay cycles, illness, delivery delays, regional emergencies, and those weeks when everything seems to go wrong at once. In practical terms, that is what makes it such a useful preparedness layer.
Build in layers: 72 hours, 2 weeks, 30 days, then deeper
A lot of people jump too far, too fast. For that reason, a layered approach works better because it keeps the system usable and affordable. At the same time, it helps you see progress sooner.
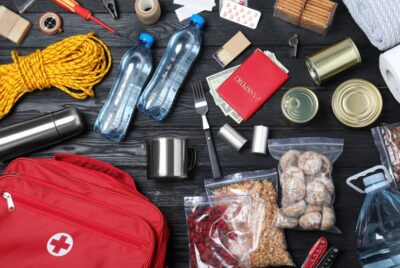
- Layer 1: 72 hours — easy shelf-stable meals and snacks, plus water and a manual can opener
- Layer 2: 2 weeks — normal pantry meals, canned proteins, grains, oats, soups, and comfort foods
- Layer 3: 30 days — deeper staples, better organization, more redundancy, improved meal planning
- Layer 4: 3–6 months and beyond — dense staples, longer shelf-life foods, and emergency-food backups
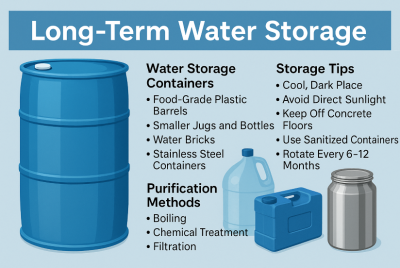
This layered system also pairs naturally with your Long-Term Water Storage plan, because food and water should never be treated as separate categories. In practice, the two systems support each other.
What to store: the foods that make the most sense first
In practice, the strongest food-storage systems start with foods you already use. Doing so lowers waste, makes rotation easier, and keeps the pantry grounded in real life rather than fantasy planning. That alone prevents a lot of expensive mistakes.
1) Everyday pantry foods
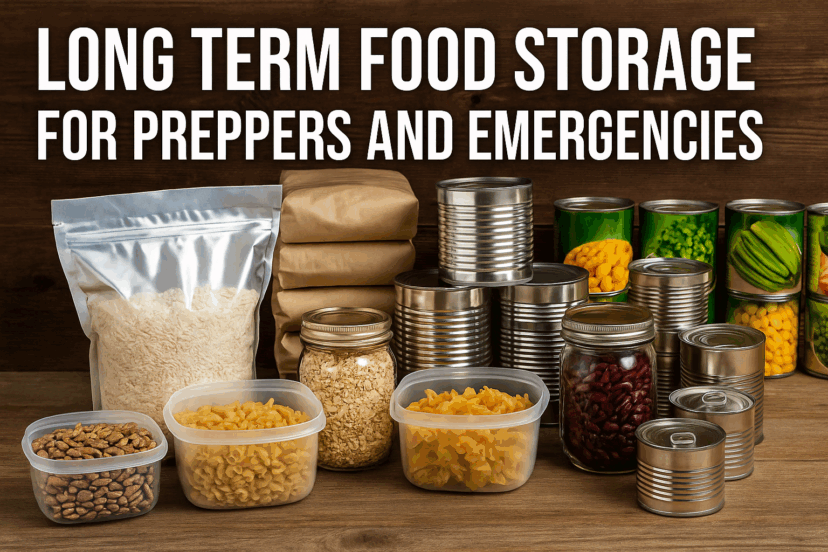
These are your most practical first buys: soups, rice, pasta, oats, canned vegetables, canned beans, canned fish or meat, nut butters, crackers, instant potatoes, pasta sauce, broth, cereal, shelf-stable milk, and simple comfort foods.
2) Dense staples
Once your first layer is stable, add dense staples that stretch your calories and increase flexibility: rice, beans, oats, pasta, flour, sugar, salt, cooking oil, bouillon, and similar basics. In addition, USDA food-storage guidance can help you think more clearly about pantry quality and storage conditions. See USDA guidance on storing dry goods and the FoodKeeper reference.
3) Ready-to-eat and low-effort foods
Of course, not every emergency is a cook-from-scratch scenario. So keep some foods that work when energy, time, or cooking ability is limited: canned chili, canned pasta meals, energy bars, protein bars, shelf-stable shakes, tuna pouches, crackers, nut butters, and easy comfort foods. That way, your plan still works when cooking becomes harder than expected.
4) Special household needs
Also account for baby items, allergies, celiac needs, older adults, pets, and medications that may affect appetite or hydration. Health Canada specifically notes allergies, celiac disease, and food intolerances when planning emergency food. That is a reminder that food storage should match the real household, not an abstract checklist. See Health Canada’s emergency food guidance.
How much food should you store?
Think in meals and days before you think in giant totals. For example: how many breakfasts does your home need for 14 days? How many dinners? How many no-cook options? How much water will those meals require? Overall, that method is much more useful than vague stockpiling.
- Build a 72-hour food layer
- Expand to 2 weeks
- Strengthen to 30 days
- Only then decide whether you want deeper 3–6 month storage
That sequence keeps the project useful and prevents expensive overbuying before your system is ready.
How to store food so it actually lasts
Heat, moisture, oxygen, pests, and disorganization shorten food life. So even good food choices can become poor storage choices if the environment is wrong. That is why storage conditions matter as much as the food itself.
- Keep food in a cool, dry place
- Protect it from pests and moisture
- Label purchase or packing dates
- Rotate what you use
- Store foods in package sizes your household will realistically open and finish
- Do not build a storage system you cannot track
In practice, a clean pantry shelf, closet, basement shelf, or under-bed storage setup often works better than an elaborate system you never maintain.
Quick price-check: food-storage supplies
Where freeze-dried food fits
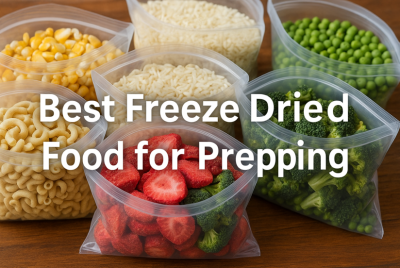
Freeze-dried food is useful, but it is not the entire strategy. Instead, it works best as a deeper backup layer for households that want long shelf life, lower rotation burden, compact storage, or emergency meal convenience. In other words, it is most valuable after your regular pantry layer is already strong. That way, it supports the system instead of replacing it.
Freeze-dried food makes the most sense for people with limited storage space, families building deeper backup layers, preppers who want less rotation work, and households that want emergency meals for stressful situations. If you want the dedicated buying guide, see Best Freeze-Dried Food for Prepping.
Mid-article upgrade: deeper emergency-food layer
If your regular pantry is already in decent shape, emergency-food kits and freeze-dried backup meals can add deeper storage with less rotation work.
A smart budget build order
If your budget is limited, buy in this order. That way, every purchase strengthens the system instead of adding random bulk. More importantly, it keeps you from overspending too early.
- Add one extra week of foods you already eat
- Expand to two weeks
- Add dense staples
- Improve water storage and meal-prep resilience
- Add emergency-food backups only after the pantry is working
That order also aligns with official advice to choose foods your family will eat and to store practical non-perishable items first. For reference, see Ready.gov’s food guidance.
Common mistakes that waste money
- Buying too much novelty food: interesting is not the same as useful
- Ignoring water and preparation needs: food without enough water or a realistic prep method is a weaker plan
- Buying too deep too early: build your regular pantry buffer first
- Failing to rotate familiar foods: your pantry should support daily life, not sit untouched until it becomes waste
- Confusing freeze-dried food with the whole strategy: it is one layer, not the entire system
A practical, repeatable system beats a dramatic one. That is the real theme here. Ultimately, quiet consistency usually outperforms panic buying. Over time, that steady approach also saves money.
Trusted resources, related guides, and food-buying paths
Trusted external resources
- Ready.gov — Emergency food guidance
- Health Canada — Food and drinking water safety in an emergency
- USDA — How to store dry goods
- FoodSafety.gov — FoodKeeper
- Government of Canada — Emergency kits
Related SurvivalTactix guides
- Best Freeze-Dried Food for Prepping
- Long-Term Water Storage
- Being Prepared for Emergencies
- 72-Hour Emergency Kit Gear Hub
Helpful buying paths
Calm + Courage: Food storage does not have to happen in one big shopping trip. One extra week of food, then two, then thirty days — that is how ordinary households quietly become more resilient. Small upgrades compound.
FAQ
How much food should I store first?
Start with a realistic 72-hour layer. Then expand to a two-week buffer using foods your household already eats. After that, build deeper only if the basics are working well.
Is freeze-dried food necessary?
No. It is useful as a deeper backup layer, but your regular pantry comes first.
What foods last the longest?
Shelf life depends on the product and storage conditions, but dense staples and properly packaged shelf-stable foods usually last longer than everyday perishables. Use official storage references and product labels for specifics.
Should I buy a big emergency-food kit right away?
Usually not. First strengthen your normal pantry and water system. After that, emergency-food kits can make sense as a deeper backup layer.
Where should I keep long-term food storage?
Store it in cool, dry, organized spaces where you can track and rotate it easily. That simple habit makes the whole system easier to maintain.
Next step
Start with the checklist and then strengthen your pantry one layer at a time. That is the fastest path to a calmer, more resilient food setup.